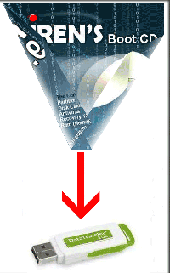
Step 1
Connect USB Pen Drive (1GB or more)
Step 2
Download and Run USB Disk Storage Format USBFormat.zip (34KB)

Step 3
Download grubinst_gui grub4dos.zip (179KB) and Run as Administrator

Step 4
Insert the BootCD (10.3 or newer) in the CD Drive and Copy everything from CD to USB Flash Drive
Step 5
Copy grldr and menu.lst from grub4dos.zip (or from HBCD folder) to the usb drive

Step 6
Test Your USB Drive (read bottom of the page for troubleshoot)
For AMI BIOS:
Connect USB Pen Drive (1GB or more)
Step 2
Download and Run USB Disk Storage Format
Step 3
Download grubinst_gui
Step 4
Insert the BootCD (10.3 or newer) in the CD Drive and Copy everything from CD to USB Flash Drive
Step 5
Copy grldr and menu.lst from grub4dos.zip (or from HBCD folder) to the usb drive
Step 6
Test Your USB Drive (read bottom of the page for troubleshoot)
Setting BIOS
Make sure you set your computer to boot from USB Flash Drive
To Enter the BIOS press the "Del" button on your keyboard. Alternatives are "F1", "F2", "Insert", and "F10". Some PC's BIOS might even require a different key to be pressed. Commonly a PC will show a message like "Press [Del] to enter Setup" to indicate that you need to press the "Del" key. Some AMI BIOS require you to enable the option "USB Keyboard Legacy support"!For AMI BIOS:
- Go to "Feature Setup". "Enable" these options: "USB Function Support",
"USB Function For DOS" and "ThumbDrive for DOS". Go to "Advanced Setup".
Set the "1st Boot Device" to "USB RMD-FDD".
Reboot the PC and it now should boot from the Usb Stick. - Go to "USB Mass Storage Device Configuration". Select "Emulation Type"
and set it to "Harddisk". Go to the "Boot Menu" and set the "1st boot device" to "USB-Stick". Exit the BIOS, saving the changes.
you can try "Emulation Type" to "Floppy" or "Forced FDD".
- Go to "Advanced BIOS Features". Go to the "1st Boot device" and set it to "USB-ZIP".
Reff:
http://www.hiren.info/pages/bootcd-on-usb-disk
Semoga Bermanfaat :)
http://www.hiren.info/pages/bootcd-on-usb-disk
Semoga Bermanfaat :)


